4.25.2016

Bee Block

COLOR FABRICS
Cut the following from 4–6 Main Color (number in parenthesis is how many used for each quadrant): 
6 (1.5)  2 7/8” square
8 (2)  1 7/8” square
12 (3)  4.5"x2.5”
4 (1)  6.5”x2.5”

WHITE:
4- 4.5” square
6- 2 7/8” square


Pairing 1 color and 1 white 2 7/8” , make 2 half square triangles. Press open, trim to 2.5". Repeat with the rest of the 2 7/8” squares.

Draw a diagonal line on the back of each 1 7/8” square. Place one on top of a 4 7/8” white square’s top left corner so that it is covering the white fabric, and one on top of its lower right, right sides together.
This photo refuses to turn, so IT IS SIDEWAYS. Please turn your head so that you see the squares on the top left and bottom right instead of top right and bottom left.


Stitch along your drawn lines. Trim, leaving a quarter inch seam. Press open. Trim to 4.5” square.


Lay one 4.5” strip over the white square’s right-hand side, right sides together. Sew with a quarter inch seam. Press open.


Sew one HST’s main color edge to the end of one of the 2.5” strips to create a long strip. NOTE THAT DIRECTIONALITY DOES MATTER, SO BE SURE IT MATCHES THE PICTURES
Stitch 1/4" seam along the righthand side.

Top: how way to match the 6.5" strip
Bottom: how to match both 4.5" strips
Press. Repeat with the other 4.5” strip and the 6.5” strip. Set the 6.5” strip aside for now.


Attach one 4.5"+HST to the bottom of the white square, matching the joins of HST on the strip to the main color strip that has already been attached.


Sew the other to the lefthand side of the white square, matching the HST to the bottom strip.

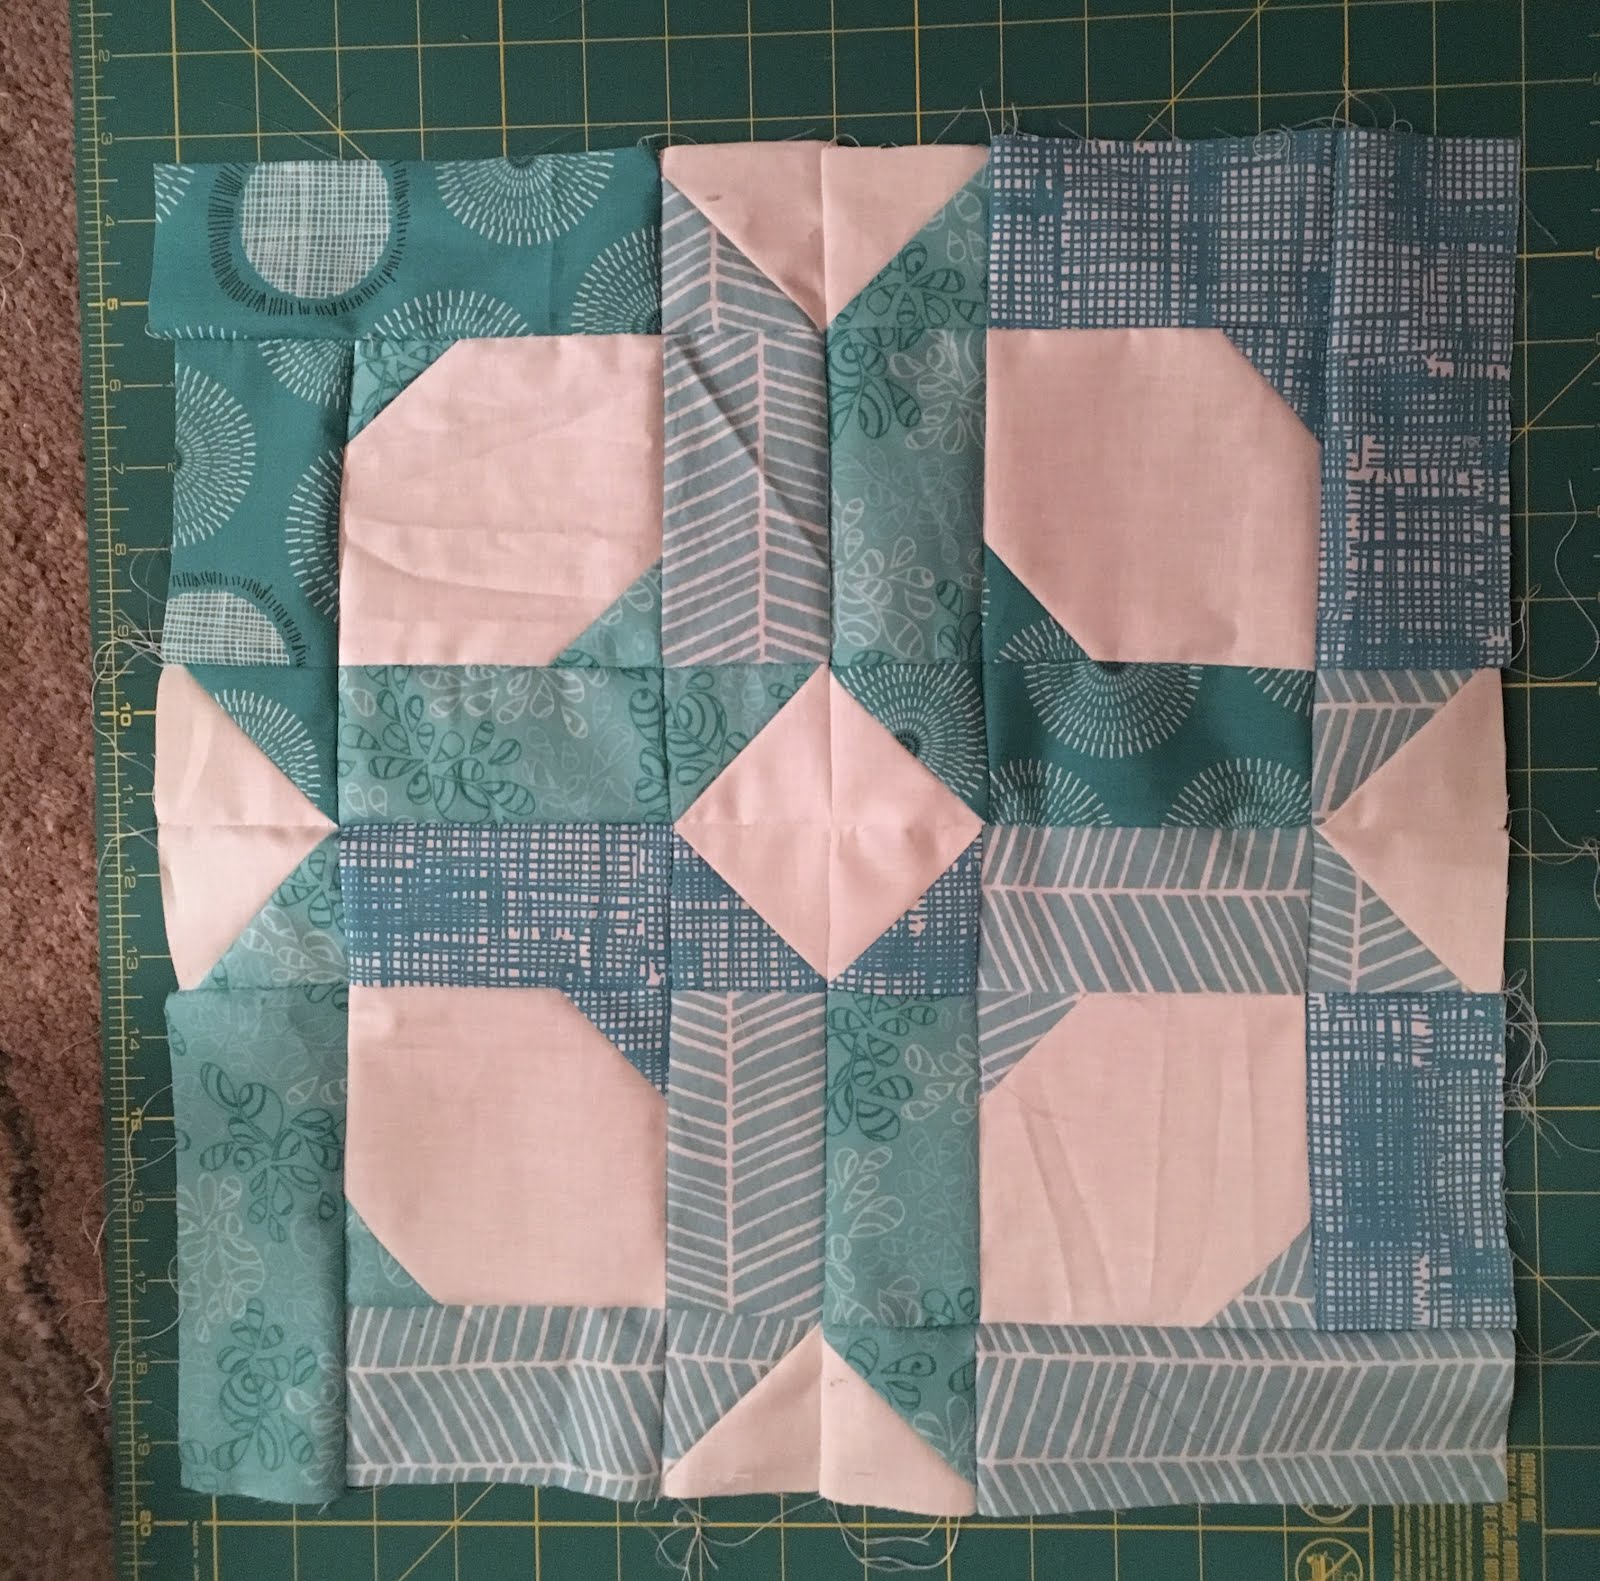
Attach the longer strip that had been set aside to the top of the square.


Repeat to make 4. Rotate blocks so that the main colored corner will not be attached to any other sides. Sew together by first sewing 2 sets of two and then sewing those together.

4.06.2016

T Shirts!

A group of friends missed Kids Sewing Week last month, so we decided to have our own. But why limit it to just a week? So April has been dubbed Kids Sewing Month, and that seems just perfect timing as we head into a new season where everyone needs new clothes!

This time was all about the School Bus Tee!

A got a geometric pattern with lime green sleeves and an added kangaroo pocket. I originally planned to swipe the pocket from the Nature Walk Pullover, but when I took the pattern out of my library, I realized that it needed some major adjustments since the pullover is much wider and that pocket goes side to side and all the way to the bottom. So I winged the shape, and I think it turned out pretty good.

I fell in love with the fabric for Duckie's when I saw it, so I bought enough to make a few things for her. But in my head, this was the only thing I saw: a tee with a cute little peplum. After putting it together and seeing it on, I may just use the rest of the fabric for more of these in the next sizes up so that she can wear one until she is 4. Which she'd probably enjoy, as she refused to take it off when I put it over her head, side seams unsewn, to check on sizing.
I made hers a bit A line by extending under the arms about half an inch near the notches, which was where I cut off the main body piece. Then I measured that and cut a 4.5" tall rectangle 150% longer for the peplum, which I gathered with 2 rows of basting stitches.
... Then I discovered that Oliver+S's tutorial page has tutorials for both adding a peplum and for switching to A line. Oh well! I haven't looked at them because my methods worked out quite well, and I'm guessing they say basically the same thing!